4.9 STAR RATING BY 501 REVIEWS

 111 Camino Alto, Mill Valley, CA 94941
 (415) 383-2382
4.9 STAR RATING BY 501 REVIEWS
111 Camino Alto, Mill Valley, CA 94941(415) 383-2382
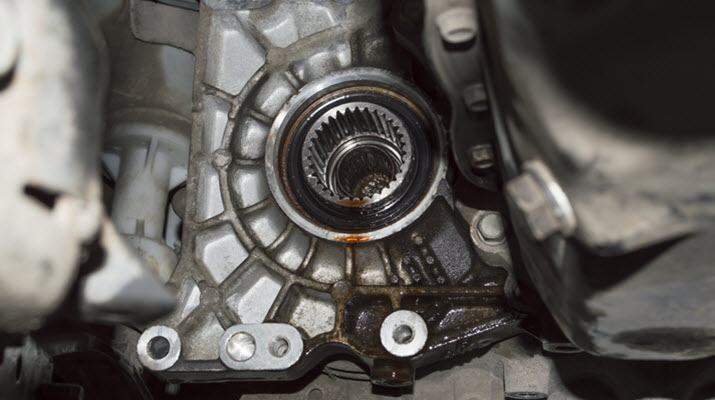
The axle seal, also called the driveshaft seal or output shaft seal, sits where the drive axle exits the transmission. Its job is to keep transmission fluid inside the housing and prevent dirt or debris from entering. Over time, heat, vibration, age, improper installation, or wear on nearby components can cause the seal to fail and allow transmission fluid to escape.
Once a leak begins, it should be addressed quickly. Leaving it uncorrected can create several problems for your Acura.
The transmission is the component most at risk. When fluid leaks through a damaged seal, the transmission begins running with a low fluid level. This leads to increased friction, overheating, and accelerated wear on internal parts. If ignored, it can result in complete transmission failure that may require extensive and costly repair.
Leaking transmission fluid can also affect other systems. It may coat brake pads and rotors, reducing braking effectiveness and creating a safety concern. It can also soften rubber suspension bushings and engine mounts over time. Additionally, leaking transmission fluid is harmful to the environment.
When the axle seal fails, replacing it promptly restores proper transmission function and prevents further damage. Here is the step-by-step process for replacing a leaking axle seal on an Acura.
Masters European & Japanese Auto Repair is the premier European and Japanese auto repair shop in Mill Valley. Our ASE-certified technicians have decades of experience diagnosing and repairing axle seal leaks and transmission-related issues in vehicles like Acura.
We use OEM-quality parts, factory-level equipment, and advanced diagnostic tools to ensure accurate, long-lasting repairs. Operating from 111 Camino Alto in Mill Valley, we proudly serve drivers in:
Whether your Acura needs axle seal replacement, transmission service, or a full inspection, our team is ready to help.
